Plotting PDF-Required Workflow
In order to be granted a reimbursement for plotting, you need to follow these steps below:
This workflow will ensure for worry free, trouble free, stress free plotting. The Advanced Technology staff have worked hard to put together a fool proof method to ensure accurate high quality fast plotting.
Creating the PDF Document to be send to the plotters from your graphics program:
Step 1: From your graphics program - Print a PDF using the Adobe PDF printer - Do not save or export a PDF from your graphics program
Set the Document Size:
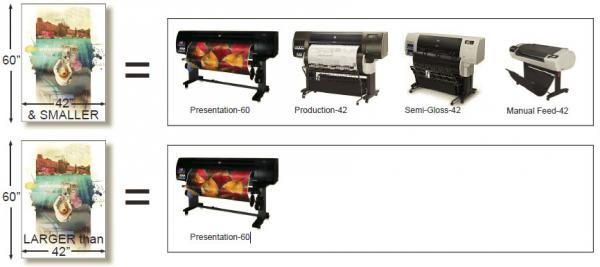
When you print the PDF from your graphics program, set the correct document size that you want plotted. Plotting a PDF directly from the graphics programs reduces errors that can occur and optimizes your file for fast high-quality plotting. MAXIMUM recommended document size = 42” x 60”

Leave 1/2” Spacing around your document:
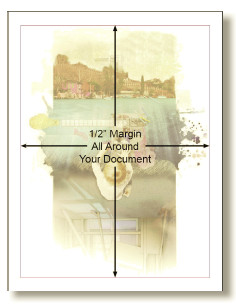
When you setup your document- leave 1/2” free space around the boarder. If you do a full bleed, the document may rotate to fit it on the page

Step 2: Open the PDF you just printed in Adobe Acrobat Pro
Set the document’s orientation to the plotter:
Orient your PDF in the Acrobat Pro window in the direction you want it to come out of on the plotter. To quickly rotate your page, in Adobe Acrobat, press Ctrl+Shift+R.
This means that the vertical axis of your screen will be in the direction that paper feeds through the plotter, and the horizontal axis of your screen will be the width of the paper.

Step 3: Open your PDF in Adobe Acrobat and choose File>Print

1: In Adobe Acrobat, choose the plotter you wish to plot to.
2: Make sure “Actual Size” is selected.
3: Check on “Choose paper source by PDF size” AND choose “Use custom paper size when needed”
4: Choose “Auto portrait/landscape”
5: Click Print to send your PDF to the plotters.
If you have problems with your plot, please refer to our troubleshooting page.
Acrobat Software Bug:
The print preview dimensions in the Acrobat plot preview window are not always accurate to what will be printed. If you see dimensions in the print preview that don’t match your document, check them again in the document. If they are correct, but the print preview shows other numbers, you can print the document anyway and the plotter will still use the correct size.
If you are unsure about any printing or plotting settings, please see an Advanced Technology staff member or a student print monitor. We are happy to answer questions at any time.
Draft plotter ARCH-Series Paper size Bug:
Currently, ARCH series papers will always rotate to come out with the longest dimension along the roll length on the draft plotter. While we work on a solution to this, if you want to print an ARCH-D (36”x24”) or ARCH-C (24”x18”) in a landscape orientation, you must crop your page, even a small amount, so that it’s size doesn’t exactly match an ARCH series paper. A 36”x24” sheet should only cost $4.44. If the price shows in the release station as $6.66, follow these instructions to correct this issue:
In Acrobat, press the pink Edit Pages button in the right hand toolbar, then click on the Crop Page button that will appear on the toolbar above your page. Crop the left or right side of your page by at least 0.1” and the page will print correctly. Since the printer’s left/right margins are roughly 0.14”, there will be no visible difference in the result.
Draft plotter direct printing:
The Draft plotter has been configured to print directly from your computers during the summer session. This means that prints immediately begin when sent to the plotter, and will not be held in a queue for release. You are responsible for the cost of any prints that are sent to this plotter, regardless if they were intentional or accidental. Please be aware that the draft plotter is very fast and there is no opportunity to cancel prints after they’ve been sent.
When printing color/line weight tests you must print to the same device that you are planning to use for your final document. Colors and line weights will match only between device types (i.e. all Presentation plotters, or all photocopiers). Print test strips prior to plotting to ensure colors and line weights match your intention.