Mapping School Printers-Mac
Last updated on June 8th, 2017
If you’re using your personal Mac laptop and would like to add one of the school printers to your printer list, follow these steps:
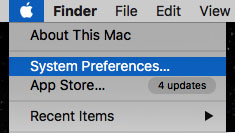
Step One: While within the Finder, click on the Apple Menu in the Upper Left hand corner of your screen. Select and System Preferences.
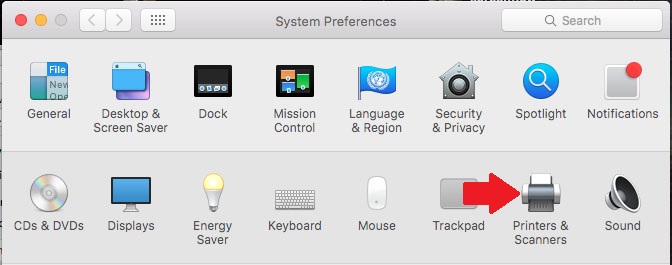
Step Two: In the Preferences window that opens, click on the Printers & Scanners button, which can be found in the second row.
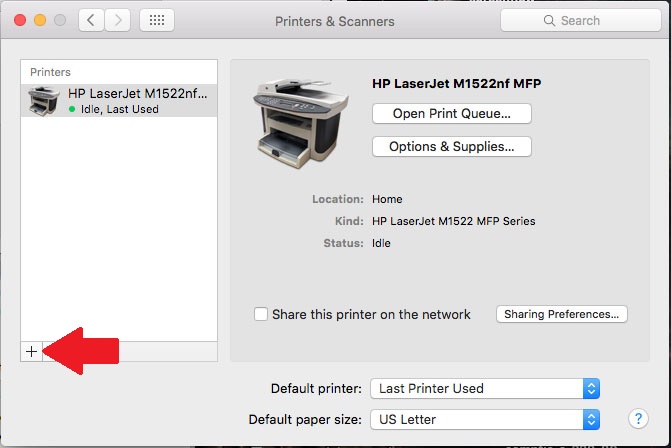
Step Three: In the Printers & Scanners window, click on the + sign underneath the left window pane to add a new printer.
Another window will open with a toolbar row of buttons across the top for the type of printer you would like to add. Click on the Advanced button on the toolbar. If you don’t see the Advanced button, hold down the Control key on the keyboard as you click on the toolbar, and choose Customize Toolbar.
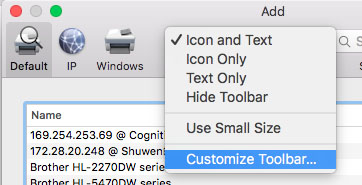
A sub-window with various buttons will appear; this allows you to customize the buttons on the toolbar.
Click on the Advanced button and drag it onto the toolbar. Once you’ve done so, click Done.

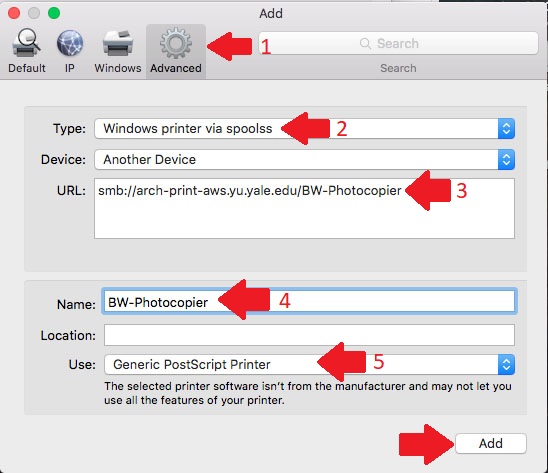
Step Four: Once you’ve added the Advanced button to the toolbar, click on the button. In the window below, select Windows printer via spoolss for the type of printer.
In the URL field, type in “smb://arch-print-aws.yu.yale.edu/your_printer_name”, replacing your_printer_name with the name of the printer you’re attempting to add, such as BW-Photocopier.
In the Name field, enter the name you wish to use to identify this printer in your printer list.
If you already have the drivers for this printer installed, you can select the driver from the Print Using list. Otherwise, leave Generic PostScript Printer selected.
Lastly click on Add.
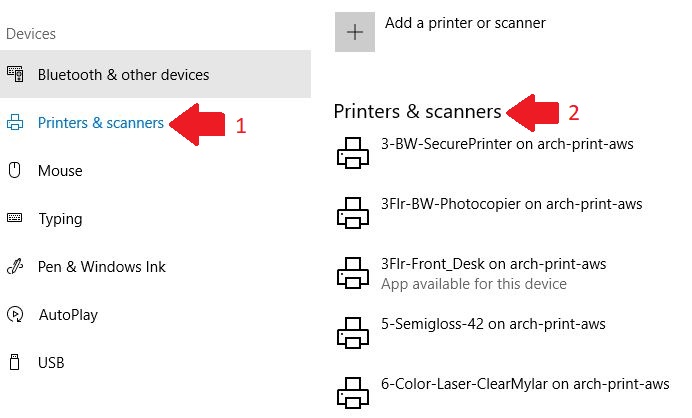
If you want to map a school printer or plotter, but do not know the name, you can see the list a list of printers from a school workstation.
Click on the Start Button and choose Settings.

Select Devices

Select Printers & scanners on the left side of the window. A list of printers and plotters names will appear in the center of the window. These printer names are the ones that you should enter.
Step Five: Click Add and the printer will be added.

Sending Jobs to the Printer:
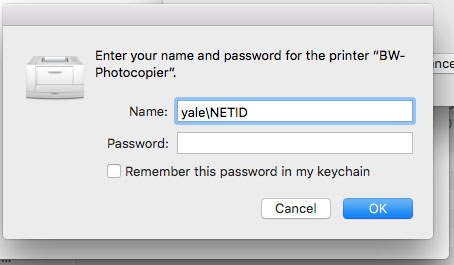
When sending to a print job to a school printer, you will see an authentication window that asks for your name and password.
In the “Name” field, enter “yale\netid”
In the “Password” field, enter your Yale password.
If you want to save your credentials so that they don’t have to be entered each time you print, you can click the box for Remember this password in my keychain.